Landscape and Nature Photography Tips for Beginners

Introduction
Landscape and nature photography is an intensely rewarding and challenging area of photography. It’s not just about capturing beautiful photos that will make your friends jealous on social media; it’s also about immersing yourself in the natural world and discovering new things about yourself, your world and its surroundings. While the subject matter is vast, there are some basic principles you can follow to improve your landscape images.
Get to know your camera.
You’ve probably heard that the best way to improve your photography is to take more photos. While this is true, it’s also true that not many of those will be good photos without knowing how to use your camera. If you’re a beginner and don’t know much about photography, here are some tips for getting started:
- Learn how to use manual mode on your camera — most cameras have it. In manual mode, you control everything. This allows you to control how long your exposure lasts as well as what other settings like how ISO and aperture are used during an exposure and the exact focal settings to enable you to get the sharpest images. You’ll want to learn how all these things work together so that each photo has the correct amount of light; this will result in better looking images with less noise than if there was too much or too little light respectively.
- Learn about histograms — The histogram shows every pixel’s brightness value relative to its position along an X axis representing brightness values ranging from 0% up until 100%. If there isn’t enough data points at either end of this spectrum (black or white), then there will be no detail visible due nothing being represented by those particular color channels! Learning manual mode and the histogram will help you to analyze each photo you take and determine what exactly is “good” (or bad) about that particular photo.
- Shoot less! Most of the time I’m out shooting, I think about how many angles and shots I can capture of a particular subject. But if you’re new to shooting on manual mode, so many of your shots are going to have problems and defects with them. That’s why it’s best for landscape and nature photography beginners I recommend that you shoot less, not more, and focus on each photo’s problems so you can correct them when you go out in your next session. Too many mess-ups will be overwhelming and won’t help you learn from your mistakes!
Start by visualizing the image that you want to capture.
If you want to capture the perfect landscape, you need to know what that looks like in your head.
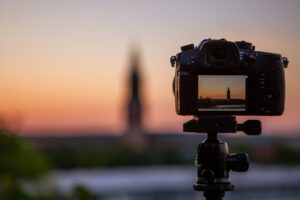
First, make sure that you have the right equipment for the job at hand. Do you need a tripod? Will you be taking long exposures? What lighting are you planning to work with, and do you plan to use any filters? A lot of this equipment is affordable and easy to find to get you started, and visualizing your landscape will help you to determine what you even need to bring with you before heading out!
Next up is visualizing the shot in your head before taking it. Ask yourself: what do I want my final image to look like? Is it going to be colorful or monochrome? Do I want there be any people in my image? What time of day should I shoot this scene so that there isn’t too much ambient light?
How about composition – what do you want to include in the frame? Do you want any foreground elements? Will the foreground (or background) elements help or hinder the subject?
All of these questions will help you to see exactly what you want to shoot and will save you hours in the editing room.
Exposure triangle.
The exposure triangle is the holy trinity of photography. It’s a simple concept that can easily be learned and applied to landscape and nature photography:
- ISO (light sensitivity) – the higher, the brighter
- Aperture (the size of the opening in your lens)
- Shutter speed (how long light is allowed to enter the camera)
The three elements of exposure—ISO, aperture and shutter speed—are balanced with one another to create an image with proper exposure. As a landscape and nature photography beginner, start by playing around with these three settings in manual mode, and watch how quickly you’re able to capture the exact shot you were envisioning in your head. Here are some quick tips that will help you get started:
- When the image is too exposed, increase the shutter speed
- If you want to focus on something close to the camera, decreasing the aperture to as low as your lens allows, somewhere between f/1 and f/5.6, will create more depth
- To create a tack sharp landscape photo, increase your aperture between f/11 – f/16
- Is your image is too dark? Try increasing the ISO. But keep in mind, when you set ISO above 1600 the image will begin to pickup more grain.
Try these tips, and then try the opposite of these tips so you can experience the full range of possibilities the exposure triangle has to offer.
Lighting.
The best way to get a feel for how light can affect your photos is to experiment with it. If you’re not sure what I mean, try this: find a nice outdoor area and start snapping photos in different lighting situations. In the morning, try shooting with the sun behind you; then shoot at midday and see how your photos change; finally, shoot in the evening when there’s no direct sunlight. The sun is a very important aspect of both landscape and nature photography and you should always try to use it to your advantage.
Are you a camping fanatic like myself? Try this the next time you spend a day at one campsite to learn how the different time of day will affect the lighting of your photo.
What was your favorite experience? Did the light add drama or impact? Does everything look more clear or less clear? How did you like the way that shadows were cast on objects around you as well as in front of them? What other kinds of effects could you come up with using this simple exercise?
Find your focus
- In landscape and nature photography, this means finding the subject of your image. For example, if you are photographing a mountain range, one of the most important things to do is find a single peak that stands out amongst the rest of the mountains and make that your focal point. If you’re photographing a waterfall, then choose an angle where it looks most dramatic or contrasts with the surrounding environment (this might also mean getting wet).
- Explore foregrounds. The foreground is defined as anything near to or under your camera’s lens – so this includes plants and trees at ground level or pebbles at water level. Try using these features in different ways: for example, take photos with some trees behind them and others in front; capture leaves falling onto rocks by using shallow depth-of-field effects; get low down on hands & knees for up close views into beds of flowers (or even grass).
- Test new angles & perspectives: When taking landscape shots try thinking about how other photographers would view/photograph this scene differently from how you see it now? What do they have that could improve upon what you already have? Can they shoot with better light conditions? Is there any way they could get closer without spoiling their composition? Think of your favorite landscape and nature photography shots from instagram, even if they are from different locations, and apply some of the techniques you love to your own photos.
Simple Composition Rules
The definition of composition is how a photographer arranges visual elements within their frame. The main goal of composition is to create a balanced, interesting and aesthetically pleasing image. There are some simple rules that can help you achieve this:

- Rule of Thirds: Imagine your frame divided into thirds horizontally and vertically by two equally spaced lines. Then place the subject in one of the four intersections of these lines (but not on all four!). This will help you avoid having a dead-center focal point that looks unbalanced.
- Golden Spiral Alignment: The golden spiral is an ancient geometric pattern found in many cultures around the world. If you draw a line from one corner of your frame to its opposite corner, then imagine a seashell spiral extending from the first corner to the next, you can use the alignment to frame shots and work with the patterns of nature. Use this method to create symmetry within your image by positioning objects symmetrically around this imaginary spiral shape within your frame.
- Rule of Odds & Evens: If you have even number objects or people in an image—such as two cars parked next to each other—it can appear boring and lifeless; however, if there’s an odd number such as three cars parked next to each other instead, then they will appear more dynamic because they take up more space visually compared with just two cars or any other even number combination.)
Understand the weather conditions before going out for the shot.
You should always choose a location based on understanding the weather conditions. For example, if you’re planning to shoot an image at sunset and there is a possibility of rain or fog, then it’s best to choose another day to shoot – unless you think this location would look great in the rain (think misty forests).
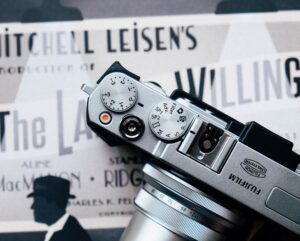
If it is raining at the time, then even if your equipment is waterproofed, you can still end up with bad shots because of water droplets on your lens. To avoid this problem, always keep your camera gear inside an air-tight bag like a hard case when taking shots in bad weather conditions. Personally I keep my camera sealed up in this Fjällräven photo bag and it has worked wonders in keeping my lens clean and camera working in all types of weather during my travels. I’ve even used it successfully at sand dunes, notorious as one of the most dangerous landscape and nature photography locations because of – you guessed it – all that sand!
Get close to nature!
The key to capturing the best landscape and nature photography scenes is not being afraid to immerse yourself in your environment, which will help bring out details that would otherwise be missed. Here are some tips on how to get close:
- Get dirty – if you’re afraid to get dirty, you should try portrait or studio photography instead. If you’re willing to lay down or kneel in the dirt, you will get some incredible perspectives of the world around you
- Find a great foreground – even if it means stepping into the long grass or the bushes, get a foreground that leads into your subject and provides the depth needed to make your photo really stand out
- Go off trail – I know my fellow conservationists won’t necessarily love this tip, but if you want shots of an area no one has gotten before, a surefire way to do this is to go off the beaten path and find those vistas and hidden areas of the forest less traveled.
- Be patient & prepared – especially if you want to shoot wildlife. Find an area where you like the fore/background, setup your lighting and exposure for the shot, increase your shutter speed to capture fast moving objects in focus, and WAIT! Some wildlife photographers wait full days for the right shot, so test your meditation skills and chill out. But remember to stay prepared, you may only have a few seconds with your subject before they run or fly off.

Conclusion.
Landscape and nature photography can be one of the most satisfying and rewarding niches of photography, but it’s also one of the most challenging. With a little practice, you can discover a whole new world that has been waiting in your own backyard! Let’s recap some of the tips in this article for you beginners:
- One of the most important things to keep in mind when shooting landscapes is framing. You want to compose your shot so that it doesn’t feel cluttered or busy—the idea here is to capture the essence of what you’re looking at and not distract from it by including too much detail or clutter. Review the common rules of composition in this article anytime you need help you with this.
- Another key component of landscape photography is lighting; when shooting outdoor scenes, try to find ways to incorporate interesting light sources into your photos.
- The exposure triangle is your ticket to professional looking photographs.
- Always remember to play! Landscape and nature photography beginners should keep a playful spirit alive to help them get past the initial learning curve in a fun and inspiring way